Email Management
Tutorial: The Best Way to Mass Delete Emails in Gmail
Step-by-step guide to mass-delete Gmail messages safely using desktop search operators, exclusions, and optional automation.
Tutorial: The Best Way to Mass Delete Emails in Gmail
If your Gmail inbox is overflowing with thousands of unread emails, deleting them in bulk can save you time and free up storage. Here’s the quickest way to clean up your inbox without losing important messages:
- Use Gmail’s Desktop Version: The desktop interface allows you to select all emails in a category or search filter, unlike the mobile app.
- Search Operators for Precision: Use filters like
category:promotions,older_than:1y, orlarger:10mbto target specific emails. - Exclude Key Emails: Add
-is:starredor-label:[name]to protect important messages. - Automate with Tools: Services like MailSweeper can handle cleanup automatically, sorting clutter into a separate folder for review before deletion.
For large inboxes, combining Gmail’s built-in tools with automation ensures efficient cleanup and long-term organization.
Gmail Storage Full? Delete Thousands of Emails FAST
sbb-itb-34b9fd2
How Gmail Handles Bulk Email Deletion
Gmail includes tools to delete multiple emails simultaneously, but these come with certain restrictions. Knowing how these tools work can help you avoid mistakenly deleting too many - or too few - emails.
How Bulk Selection Works in Gmail
When you click the checkbox in the top-left corner of Gmail, it only selects the emails visible on your current page - about 50 (or up to 100 if you’ve adjusted your settings). To select all emails that match your search or filter, you need to click the secondary banner prompt that appears at the top of the screen.
"Gmail initially selects only the emails visible on the current page. Make sure to click the option to select all conversations matching your search." - Geri Mileva, Content Writer, Clean Email
Keep in mind that if you have Conversation View enabled, deleting a single email removes the entire thread. Deleted emails are moved to the Trash folder, where they remain for 30 days unless you manually empty it by clicking "Empty Trash now".
Understanding these details can help you clear out unnecessary emails while safeguarding important ones.
Why Bulk Deletion on Mobile Is Limited
If you're using the Gmail app on your phone, you’ll notice it lacks the option to "Select all conversations" for your entire inbox or folder. You can only select the emails currently displayed on your screen - about 50 at a time. To delete more, you’ll need to scroll down, load additional emails, and repeat the process.
"The Gmail mobile app lets you select multiple emails. But it's limited to just the 50 messages displayed. There's no option to Select all conversations across your entire inbox." - Paul Anthonioz, Content Editor, Mailmeteor
For larger cleanups, the desktop version is far more efficient. It provides access to the "Select all conversations" feature, advanced search operators, and the ability to create filters - none of which are available in the mobile app.
| Feature | Gmail Desktop | Gmail Mobile App |
|---|---|---|
| Bulk selection | Full selection via "Select all conversations" link | Limited to visible messages at a time |
| Search operator support | Full support | Supported but limited |
| Filter creation | Available | Not available |
| Efficiency for large cleanups | High | Low |
These limitations highlight the advantages of using Gmail’s desktop interface for large-scale email management, setting the stage for our next guide on how to safely delete unwanted emails without losing important ones.
Step-by-Step: Mass Deleting Emails in Gmail Without Losing Important Ones
If you're looking to clean up your Gmail inbox without accidentally deleting something important, Gmail's features like category tabs and search operators can make the process efficient and safe.
How to Filter Promotions, Social, and Updates Emails
Gmail automatically organizes incoming emails into tabs like Promotions, Social, and Updates. These tabs often contain non-essential emails - think newsletters, sales, app notifications, and social media alerts.
To clean up a specific tab (e.g., Promotions):
- Open the tab on your desktop.
- Click the checkbox at the top-left corner to select all visible emails.
- A banner will appear at the top - click "Select all conversations in Promotions".
- Hit the Trash icon to delete everything.
Before hitting delete, scan the tab for any important emails, such as order confirmations, you might want to keep.
Using Search Operators to Target Specific Emails
Search operators in Gmail allow you to pinpoint exactly which emails to delete. Whether you're targeting emails by category, age, size, or read status, these filters give you precision.
| Goal | Search Operator | Example |
|---|---|---|
| Promotions | category:promotions |
category:promotions older_than:1y |
| Social | category:social |
category:social is:unread |
| Updates | category:updates |
category:updates older_than:6m |
| Large emails | larger: |
larger:10mb |
| Emails before a date | before: |
before:2024/01/01 |
For example, entering category:promotions older_than:2y will show promotional emails older than two years. Once you've run the search, click the "Select all conversations that match this search" option in the banner to ensure you grab everything, not just the first 50 results.
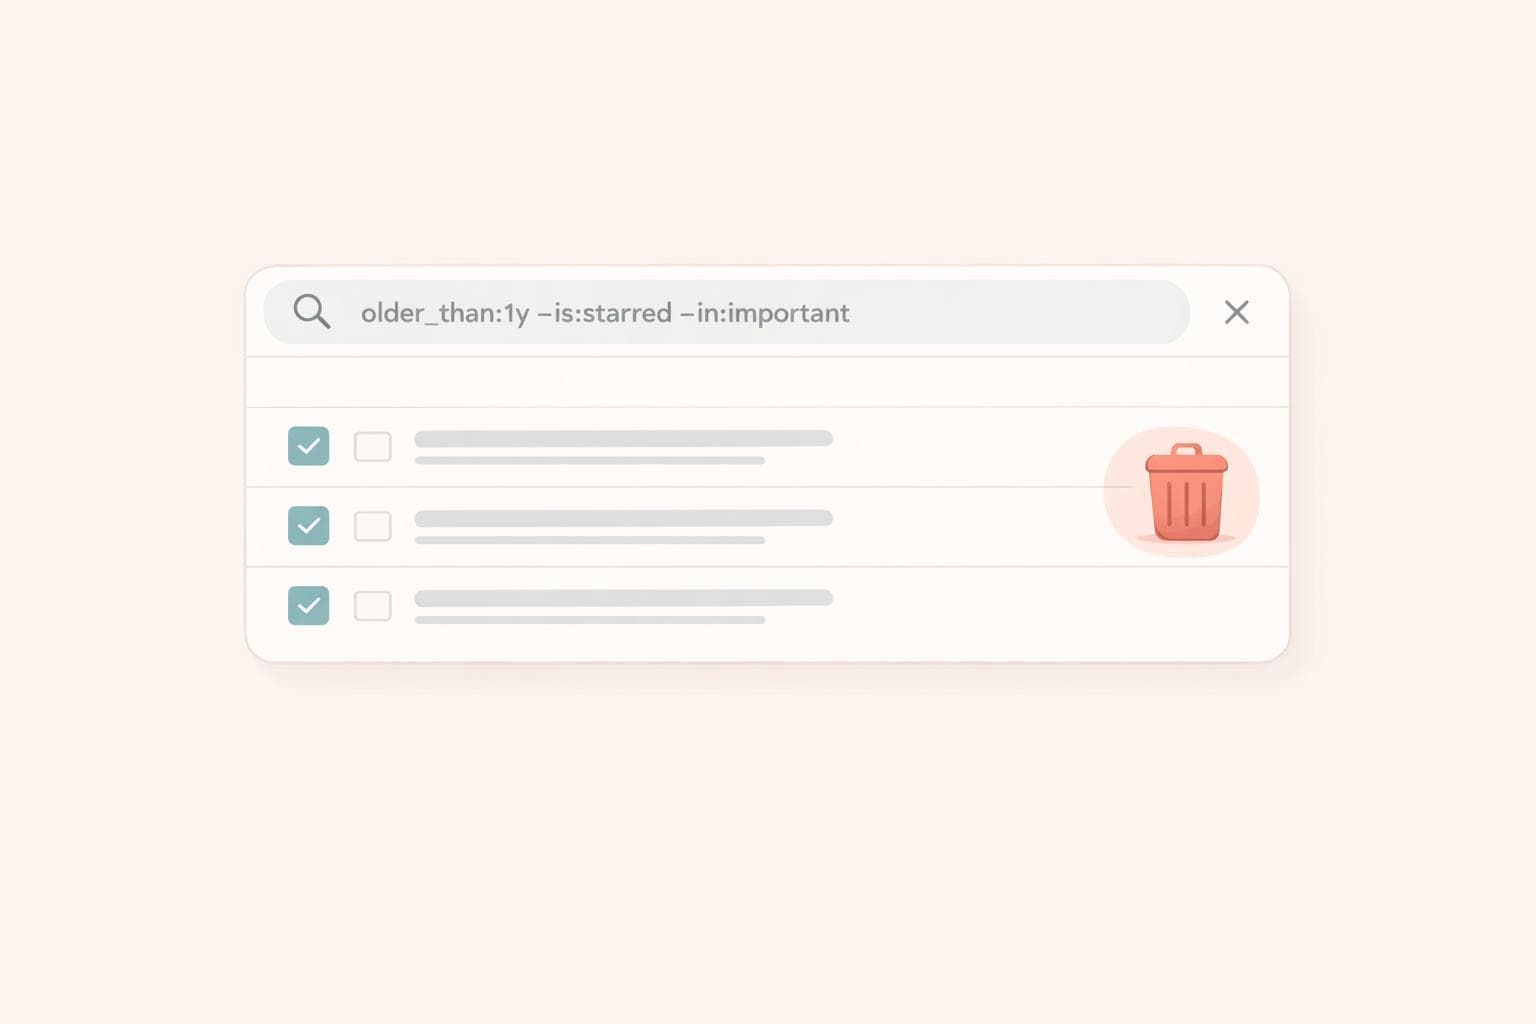
How to Exclude Important, Starred, or Labeled Emails
To avoid losing important emails, use Gmail's minus sign operator (-) to exclude specific types. For instance:
-is:starredensures starred emails are left untouched.-is:importantskips emails marked as important by Gmail.-label:[name]protects emails under a specific label.
You can combine these exclusions with other filters for even more control. For example, the query category:promotions older_than:2y -is:starred -label:Receipts will delete promotional emails older than two years while keeping starred or labeled emails safe.
"Deleting without unsubscribing means the same emails return." - Devlints, Contributor
This is a key point to remember. Without unsubscribing from unwanted sources, your inbox will likely fill up again in no time. Once you've deleted the unwanted emails, go to the Trash and click "Empty Trash now" to immediately reclaim storage space.
Up next, discover how tools like MailSweeper can automate these steps for a hassle-free inbox.
Automating Gmail Cleanup with MailSweeper
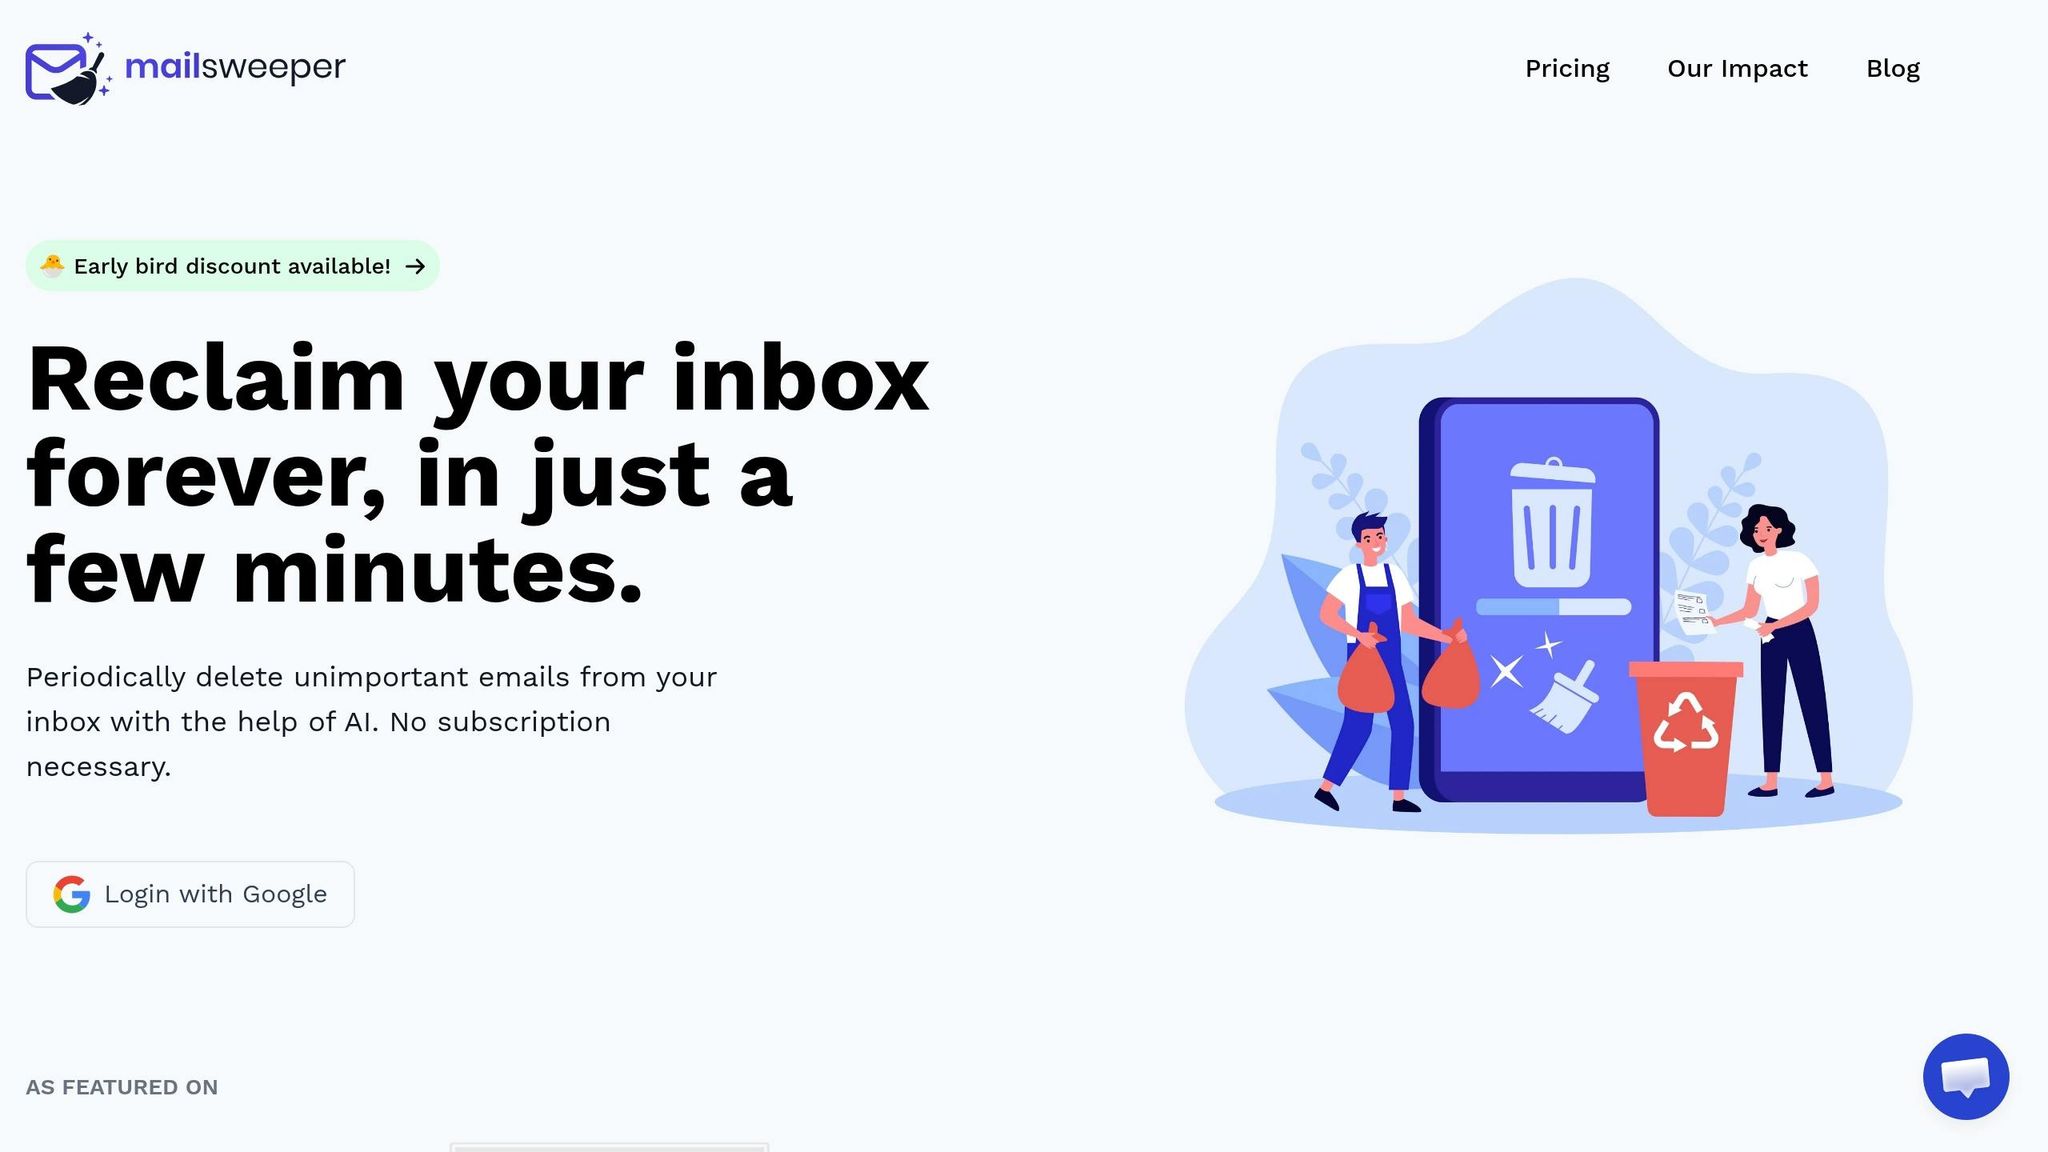
Tired of slogging through endless emails to clear your inbox? MailSweeper takes over the hassle by automating the cleanup process, saving you time and effort.
How the Dustpan Works
MailSweeper introduces the 🧹 Dustpan label to your Gmail account, making it easier to sort and manage non-essential emails. Using AI, it identifies less critical messages - like shopping deals or notifications - and automatically assigns them to the Dustpan label. It primarily focuses on emails in the Promotions, Social, and Updates categories, ensuring your important messages remain untouched. Think of the Dustpan as a holding area: if you spot an email you want to keep, just remove the label, and it’s safe. Plus, MailSweeper won’t move starred, important, or Primary inbox emails, so your key messages are always secure.
Setting Your Cleanup Preferences
Getting started is simple and quick. After signing in, you’ll choose the categories (like Promotions, Social, or Updates) you want MailSweeper to monitor. Then, decide how long emails should stay in the Dustpan - options typically include 30 or 90 days - before they’re permanently deleted. Once configured, MailSweeper takes over, handling cleanups automatically without needing further action from you.
Why Automated Cleanup Saves Time
MailSweeper doesn’t just organize your inbox - it also helps manage Gmail’s storage limits by periodically deleting old emails from the Dustpan. This means you can avoid running out of storage or paying for extra space. So far, MailSweeper has cleared 4,494,677 emails, saving users a combined 328 GB of storage space. With a one-time fee of $16 for the Early Bird plan or $20 for the Personal plan, it’s a low-maintenance solution to keep your inbox tidy and stress-free.
Manual Deletion vs. MailSweeper: A Side-by-Side Look
Manual Gmail Deletion vs. MailSweeper: Full Comparison
Manual deletion gives you control over your inbox, but it’s a tedious and time-consuming process. You’ll need to run multiple search queries and sift through emails page by page. Plus, there’s always the risk of accidentally deleting something important - Gmail doesn’t offer a "do not delete" lock, and a single missed exclusion operator could erase emails you actually need.
MailSweeper, on the other hand, automates the process and avoids these risks entirely. It skips over starred, important, and Primary inbox emails before flagging anything for deletion. As shown earlier, MailSweeper efficiently clears out social, update, and promotional emails while safeguarding the ones that matter most. Here’s how the two methods stack up in terms of effort, scope, and safety.
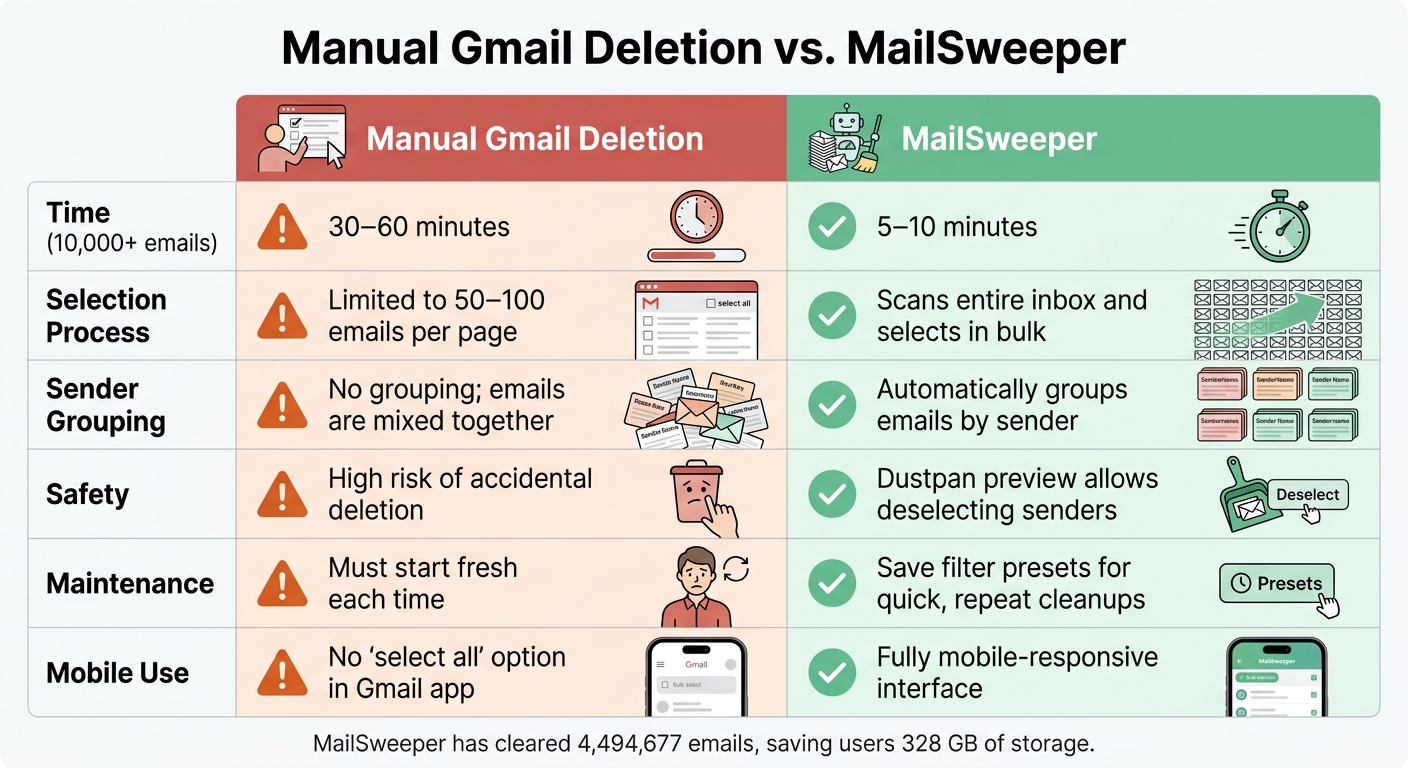
Effort, Scope, and Maintenance: How They Differ
| Feature | Manual Gmail Deletion | MailSweeper |
|---|---|---|
| Time (10,000+ emails) | 30–60 minutes | 5–10 minutes |
| Selection Process | Limited to 50–100 emails per page | Scans the entire inbox and selects in bulk |
| Sender Grouping | No grouping; emails are mixed together | Automatically groups emails by sender |
| Safety | High risk of accidental deletion | Dustpan preview allows you to deselect senders |
| Maintenance | Must start fresh each time | Save filter presets for quick, repeat cleanups |
| Mobile Use | No "select all" option in the Gmail app | Fully mobile-responsive interface |
The table makes it clear: MailSweeper is the better choice for long-term inbox management.
Another key difference is ongoing maintenance. With manual deletion, your inbox begins to fill up again almost immediately. Unless you take the time to unsubscribe from clutter-generating senders, you’ll find yourself back at square one in no time. MailSweeper eliminates this issue by working continuously in the background, so you don’t have to repeat the process.
Stefan, the founder of Automateed, summed it up perfectly after trying the tool:
"MailSweeper ran seamlessly in the background, deleting junk emails and saving me hours of manual cleanup."
If your inbox is small and you only need a one-time cleanup, manual deletion might be enough. But for anyone managing a high-volume inbox or wanting to keep things tidy over time, manual deletion quickly becomes a repetitive and frustrating task. MailSweeper takes care of the heavy lifting, ensuring your inbox stays organized without constant effort.
Conclusion: How to Keep Your Inbox Clean Going Forward
Maintaining a tidy Gmail inbox is all about building consistent habits. This guide walked you through safely mass-deleting emails by focusing on less critical categories like Promotions, Social, and Updates, using precise filters to target nonessential messages, and highlighted Gmail's 30-day recovery window for deleted emails. These steps lay the groundwork for choosing a sustainable, long-term approach.
Manual deletion provides quick results but can be time-consuming and requires regular effort. For ongoing convenience, tools like MailSweeper's Dustpan can automate inbox maintenance while ensuring important emails are preserved. With just one setup, the tool takes over the daily upkeep, saving you time and energy.
For the best results, combine Gmail's built-in tools for hands-on control with MailSweeper for automated maintenance. Start with cautious settings, then tweak them as your needs evolve.
The goal isn't to achieve an empty inbox overnight —a philosophy often referred to as Inbox Zero— - it’s about creating a system that keeps your emails manageable without constant intervention. By following this approach, you can enjoy a clutter-free inbox and a more efficient email experience.
FAQs
How do I delete all Promotions emails at once?
To clear out all emails in the Promotions tab of Gmail, follow these steps:
- Open the Promotions tab in your Gmail inbox.
- Use the checkbox in the top left corner to select all visible emails on the page.
- A message will appear offering to "Select all conversations that match this search." Click this link.
- Click the trash bin icon to delete the selected emails.
If you’re looking for an easier, automated way to handle this, tools like MailSweeper can simplify the process. It helps you clean up your inbox efficiently while keeping important messages safe.
How can I delete old emails but keep starred ones?
To clean up old emails while keeping your starred ones intact, Gmail's search operators can help you filter messages effectively. For example, use a search like category:promotions older_than:1y -is:starred. This will show emails in the Promotions category that are over a year old, excluding any that are starred.
To automate the process further, tools like MailSweeper can step in. They can safely delete unstarred emails while ensuring your important starred messages remain untouched. It's a quick way to tidy up your inbox without losing anything important.
How does MailSweeper avoid deleting important emails?
MailSweeper uses smart filters and AI to target and remove low-priority emails, including those from the social, updates, and promotions tabs. At the same time, it ensures important emails - like starred messages or those assigned to specific labels - are left untouched. This automated system helps keep your inbox tidy while making sure essential messages stay safe.
