Email Management
How to clear your gmail inbox, in minutes
Clean your Gmail in minutes: empty Trash/Spam, use search operators, set filters, and automate with MailSweeper to free storage and stay organized.

How to clear your gmail inbox, in minutes
Your Gmail inbox doesn’t have to stay messy. With a few quick steps, you can clean it up in minutes and keep it organized moving forward. Here's how:
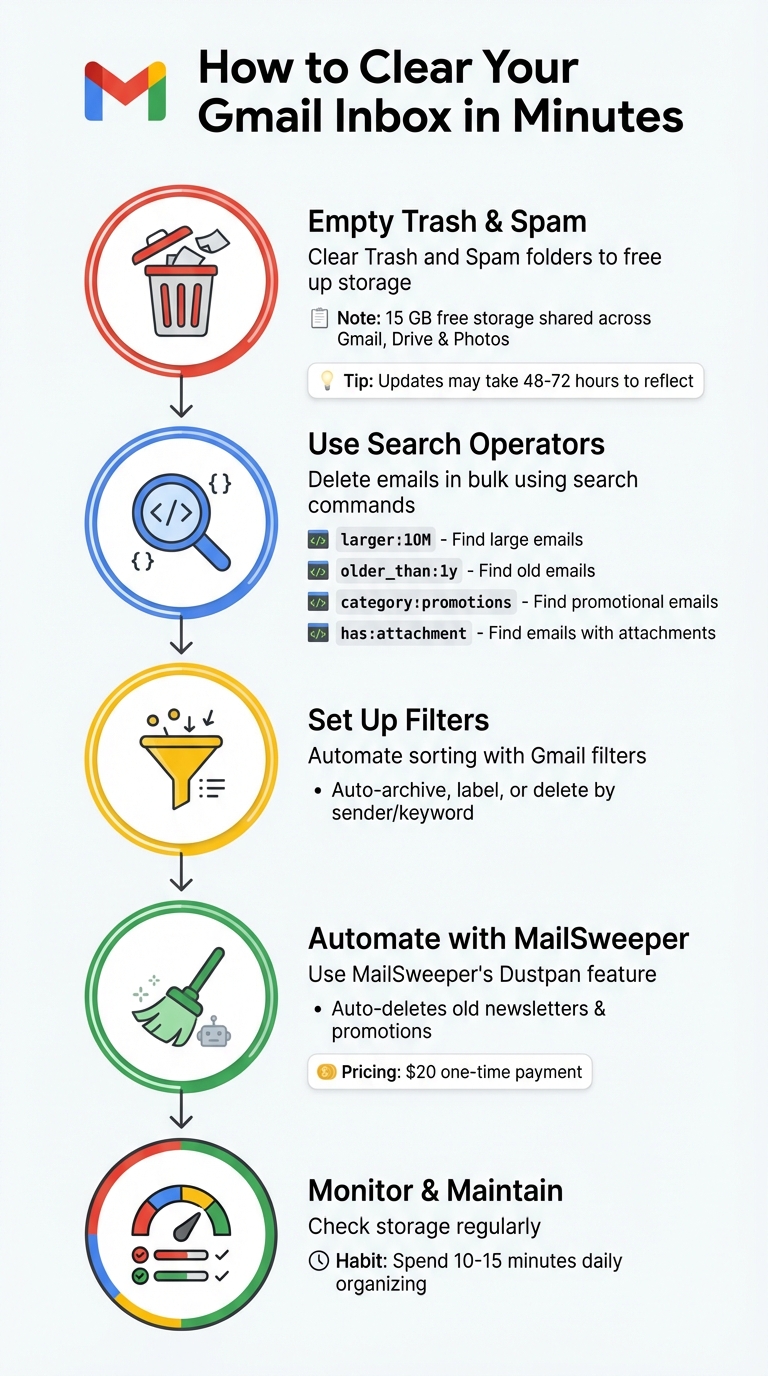
- Empty Trash and Spam: Clear these folders to free up storage space.
- Use Search Operators: Quickly find and delete emails in bulk using commands like
older_than:1yorlarger:10M. - Set Up Filters: Automate sorting by creating rules for specific senders or keywords.
- Automate with MailSweeper: Use tools like MailSweeper to handle repetitive cleanup tasks, such as deleting old newsletters.
- Check Storage: Regularly monitor your Gmail storage and remove large or unnecessary emails.
These steps combine Gmail’s built-in tools with automation to help you regain control of your inbox and save time.
5 Steps to Clean Your Gmail Inbox in Minutes
How To Clean Up Gmail Inbox in 1 Minute | Bulk Delete Emails Quickly
sbb-itb-34b9fd2
Step 1: Empty Your Trash and Spam Folders
A simple but effective way to free up space in your Google account is by clearing out the Trash and Spam folders in Gmail. Even though these emails are "deleted", they still take up storage space until they're permanently removed. With Google offering just 15 GB of free storage shared between Gmail, Google Drive, and Google Photos, every bit of space matters. By manually clearing these folders, you can reclaim storage instantly - though it may take up to 48–72 hours for the updates to reflect.
Locating the Trash and Spam Folders
Finding these folders is straightforward but may require a little digging. On a computer, scroll down the left-hand sidebar in Gmail and click More to reveal hidden options like Spam and Trash (sometimes called "Bin"). On the Gmail app, tap the Menu icon (three horizontal lines) and scroll through the list to find these folders.
Deleting Emails Permanently
Once you're inside the Trash or Spam folder, look for a link at the top of the page, such as "Empty Trash now" or "Delete all spam messages now." Clicking this link will permanently erase all messages in the folder. Prefer a more selective approach? Simply check the boxes next to individual emails you want to remove. If you’re dealing with multiple pages of messages, Gmail provides a handy "Select all [number] conversations in Trash" option. After selecting, click "Delete forever" to clear them out for good.
Taking a few minutes to clean these folders can make a noticeable difference in your storage and keep your account running smoothly.
Step 2: Use Gmail Search Operators to Delete Emails in Bulk
Gmail search operators are your shortcut to a cleaner inbox. Instead of scrolling endlessly, these commands sift through thousands of emails in seconds, saving you loads of time. Matteo Duò, Head of Content at Kinsta, sums it up perfectly:
"If you want to master your inbox, you need to be using Gmail search operators".
Here’s how these operators can make bulk email deletion a breeze.
Search Operators You Should Know
Search operators use a straightforward format: operator:term. Keep it tight - don’t add spaces between the colon and the term (e.g., from:amazon.com). Below are some of the most effective ones:
| Operator | What It Finds | Example |
|---|---|---|
larger:[size] |
Emails over a specific size (K or M) | larger:10M |
older_than:[time] |
Emails older than a set timeframe (d, m, y) | older_than:1y |
is:unread |
All unopened emails | is:unread |
category:[name] |
Emails in specific tabs (e.g., promotions, social) | category:promotions |
from:[sender] |
Emails from a specific sender or domain | from:newsletter@site.com |
has:attachment |
Emails with file attachments | has:attachment |
You can mix and match these operators by separating them with spaces. For instance, has:attachment larger:10M older_than:1y will locate older, larger emails with attachments. To exclude certain emails, add a minus sign (e.g., -is:starred to skip flagged messages).
How to Search, Select, and Delete
Start by typing a search operator, like category:promotions, into Gmail’s search bar and hit Enter. Then, click the checkbox at the top left of the message list. Gmail will select only the visible emails - usually about 100 per page. To delete everything matching your search, click the blue link that says "Select all conversations that match this search." This way, you can delete thousands of emails in one go, not just the ones on the first page.
Once you’ve selected the emails, hit the trash can icon and confirm. Keep in mind that deleted emails still count toward your 15 GB storage limit until you empty the Trash folder. To free up space immediately, go to Trash and click "Empty Trash now." Be aware, though, that it might take 48–72 hours for your storage quota to reflect the changes.
If Gmail slows down during large deletions, try working in smaller batches of 1,000 to 2,000 messages at a time.
Step 3: Use Gmail Filters and Storage Manager
Once you've tackled bulk email deletion, it's time to focus on maintaining a clutter-free inbox over the long haul. Gmail offers tools to help you manage storage and keep your inbox organized, so you don’t end up back at square one.
Using Google's Storage Manager
Did you know that Gmail, Google Drive, and Google Photos share the same 15 GB storage limit? If you go over this limit, your email service could be disrupted. To check how your storage is being used, head to your Google Account storage page. Google makes it easy by identifying large attachments, old emails, or even Android backups that are hogging space.
A handy tip: use search operators like has:attachment larger:10M to find emails with hefty attachments. Once identified, delete those emails in batches to free up space.
One thing to note - when you delete emails, they still count toward your storage limit until you empty your Trash folder. And after a major cleanup, it might take Google several hours (or even up to a day) to update your storage totals.
Setting Up Filters for Automatic Sorting
Filters are like having a personal assistant for your inbox - they automatically sort incoming messages based on rules you set. To create one, click the search options icon in Gmail, enter criteria like a sender’s email address or specific keywords, and then choose an action: “Skip the Inbox (Archive it),” “Apply the label,” or “Delete it.” Once you're satisfied, click "Create filter." If you want to see how it works before committing, click "Search" to preview the results.
For example, you can filter calendar invites by searching for emails with "invite.ics" or "invite.vcs" and set them to bypass your inbox entirely. Another trick? Use a plus-sign alias when signing up for newsletters (e.g., yourname+news@gmail.com) and create a filter to label and archive those messages automatically.
And if a conversation thread becomes irrelevant, the Mute option is your best friend. It ensures future replies skip your inbox and head straight to the archive. These filters are a game-changer for keeping your inbox neat and manageable moving forward.
Step 4: Automate Cleanup with MailSweeper
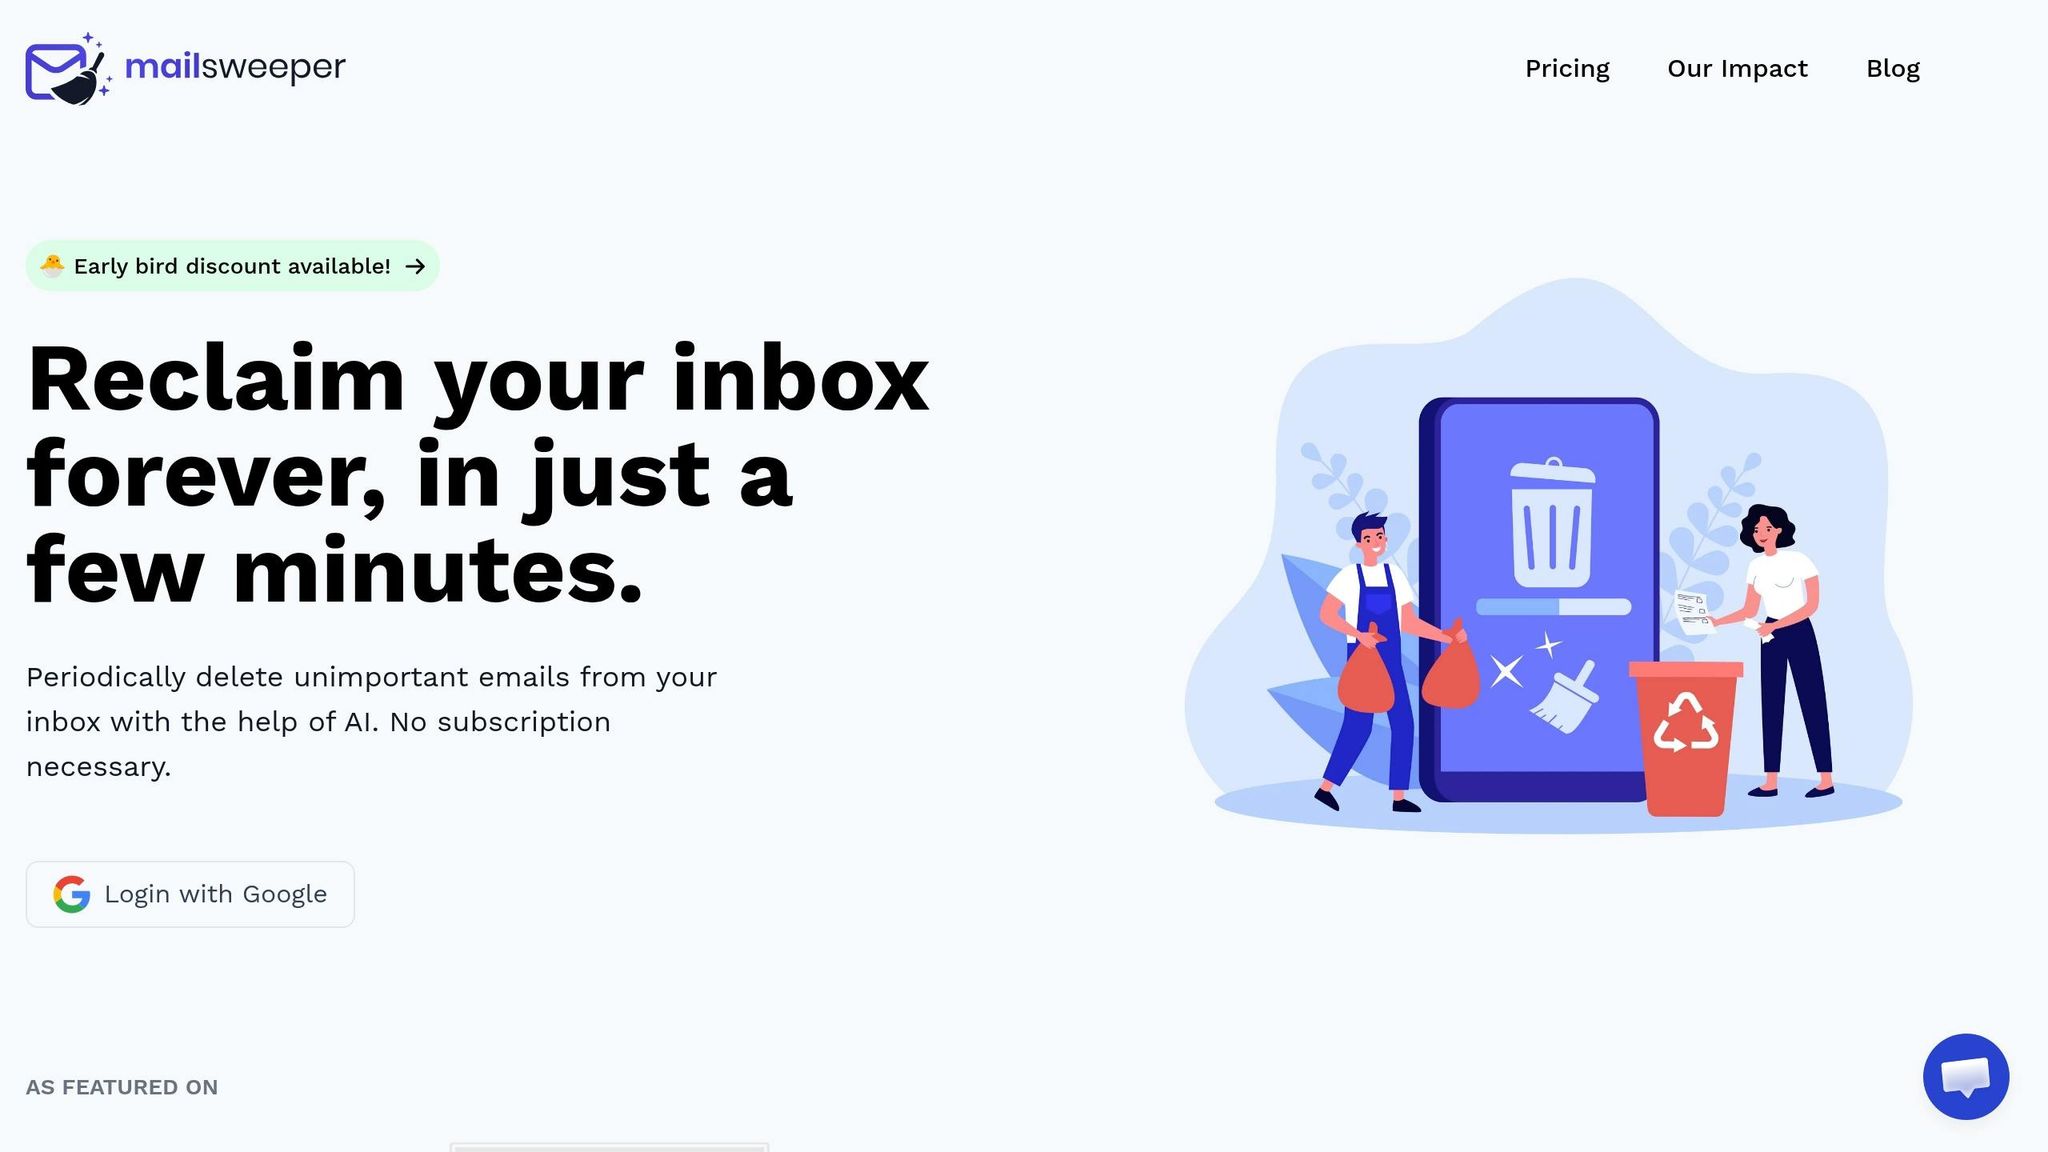
Gmail filters and storage tools are great for getting organized, but MailSweeper takes it a step further by automating the cleanup process. No more manual sorting - MailSweeper does the heavy lifting for you.
How MailSweeper Works
At the core of MailSweeper is its standout feature: the Dustpan. Once you install MailSweeper, it creates a Dustpan label in your Gmail inbox. This label automatically gathers less critical emails - think newsletters, promotions, and notifications - while steering clear of anything important. Emails in your Primary inbox, starred messages, or those marked as important are left untouched by the AI.
Emails collected in the Dustpan stay there until they hit the cleanup threshold you set. After that, MailSweeper will delete anything older than your chosen timeframe - commonly 30 or 90 days. This ensures you don’t get buried in clutter but still have a grace period to recover anything you might need.
Setting Your Cleanup Preferences
Once your Gmail account is connected to MailSweeper, you can fine-tune the cleanup schedule to match your needs. Many users prefer a 30-day deletion cycle for a more streamlined inbox, while others opt for 90 days to keep a longer buffer. You can also tweak the AI filters to decide what gets swept into the Dustpan. Just ensure that Primary, Starred, and Important emails are protected to avoid losing anything crucial.
Once your preferences are set, you’re ready to enjoy a cleaner inbox. Let’s take a look at the pricing.
MailSweeper Pricing
MailSweeper operates on a one-time payment model, so there’s no need to worry about recurring subscription fees. Here’s what you get:
| Plan | Price (One-time) | Key Features |
|---|---|---|
| Personal | $20 | Lifetime access, AI Dustpan, Custom schedules |
The Personal plan is ideal for anyone managing a single Gmail account. If you’re juggling multiple accounts, MailSweeper offers additional options, but for most users, the Personal plan hits the mark perfectly.
Step 5: Check Your Results and Keep Your Inbox Clean
Check Your Gmail Storage
After letting MailSweeper do its magic, it's time to see how much space you’ve freed up. You can check your storage usage by visiting drive.google.com/settings/storage or through the Google One Storage Manager. This will show how much space Gmail, Google Drive, and Google Photos are taking up.
Keep in mind that storage updates might take 48 to 72 hours after a big cleanup. Also, emails in your Trash and Spam folders still count toward your quota until you empty them completely. If you skipped clearing Trash and Spam earlier, revisit Step 1 to handle it.
Once you've verified your storage gains, it’s time to focus on keeping your inbox organized moving forward.
Tips for Staying Organized
Now that your inbox is tidy, the key is maintaining it. Dedicate 10–15 minutes each day to either archive or delete read emails and unsubscribe from newsletters you no longer want.
Take advantage of Gmail filters to automate sorting. For instance, you can create a filter using from:(noreply@*) to label or archive automated notifications that don’t need your immediate attention. Pair this with MailSweeper's Dustpan feature, and most of the work will be done for you. Additionally, run a search like larger:10M to find and delete large emails that are eating up space.
Conclusion
This guide has walked you through simple steps to clear storage and declutter your Gmail inbox in no time. By combining Gmail's built-in tools with MailSweeper's automation, you can streamline your email management effortlessly.
Start with the basics: clear out your Trash and Spam folders. Then, take advantage of Gmail's search operators to identify and remove large or outdated emails. Gmail's filters and storage tools help pinpoint where your storage is being used and allow you to organize incoming emails automatically.
MailSweeper takes it a step further with its Dustpan feature, which automates the removal of unimportant emails based on your preferred timeframe. By sticking to this routine, you can keep your inbox tidy and manageable on a daily basis.
"A full Gmail inbox isn't a moral failing - it's just digital clutter most of us never learned to manage." - Sabri Mian, Tech Writer
The key is consistency. Use Gmail's search and bulk deletion for quick fixes, and rely on MailSweeper for ongoing maintenance. This combination of manual effort and automation ensures your inbox stays organized while saving you valuable time.
FAQs
How do I avoid deleting important emails during a bulk cleanup?
To clean up your Gmail efficiently, use the search filters to pinpoint specific email categories. For instance, you can filter emails older than a year or those from specific senders. Once you've applied a filter, click on "all conversations that match this search" to select and review the emails before taking action.
Stay organized by regularly reviewing your subscriptions and labels to ensure emails are categorized correctly. And if you're unsure about an email's importance, consider archiving it instead of deleting. Archiving keeps the email accessible while keeping your inbox clutter-free.
Why does my storage look the same after I delete a lot of emails?
Deleting emails alone doesn’t instantly free up space in Gmail. That’s because deleted emails are moved to the Trash and remain there for a set period before being permanently removed. To free up storage right away, you’ll need to manually empty the Trash folder.
Additionally, emails with large attachments can take up a significant amount of storage. Simply deleting emails without addressing these bulky files might not make much of a dent in your storage. To maximize space, focus on clearing out emails with large attachments and data-heavy files.
What’s the fastest search to find emails taking up the most space?
To locate large emails in Gmail quickly, use the search operator larger:10M (or adjust the size, like larger:5M). This will filter emails exceeding the specified size, helping you pinpoint and review the biggest ones. Deleting these can free up storage space with minimal effort.
