Email Management
5 Steps to Automate Gmail Email Deletion
Automate Gmail cleanup in five steps to delete low-priority emails, free storage, and save hours of inbox maintenance.
5 Steps to Automate Gmail Email Deletion
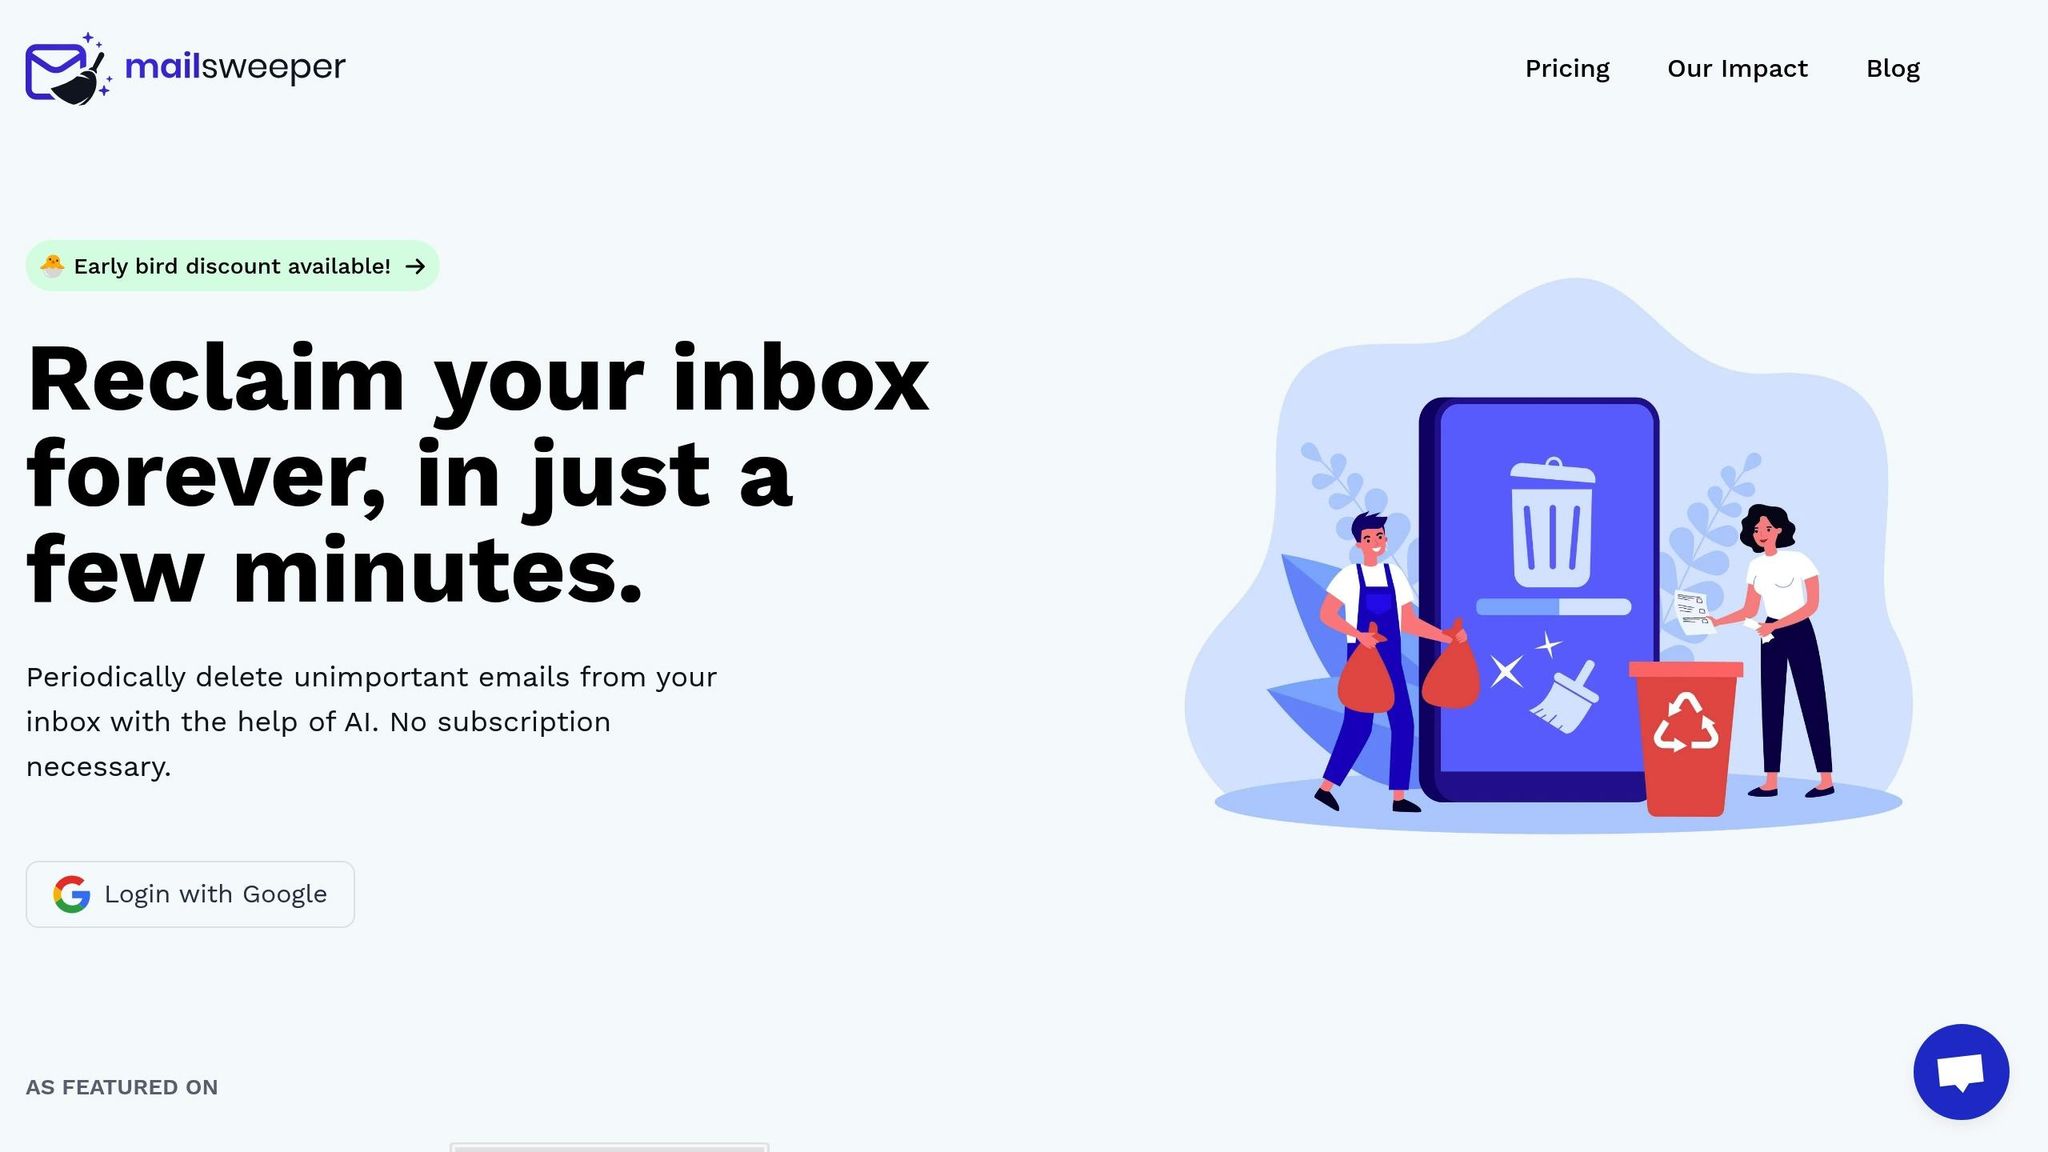
Tired of a cluttered Gmail inbox? Here's how you can automate email deletion and reclaim your time and storage space with MailSweeper, an AI-powered tool. Gmail’s 15GB free storage fills up fast, and manually deleting emails or paying for extra storage can be frustrating. MailSweeper offers a one-time payment solution (starting at $16) to clean up your inbox automatically, without recurring fees.
Key Steps:
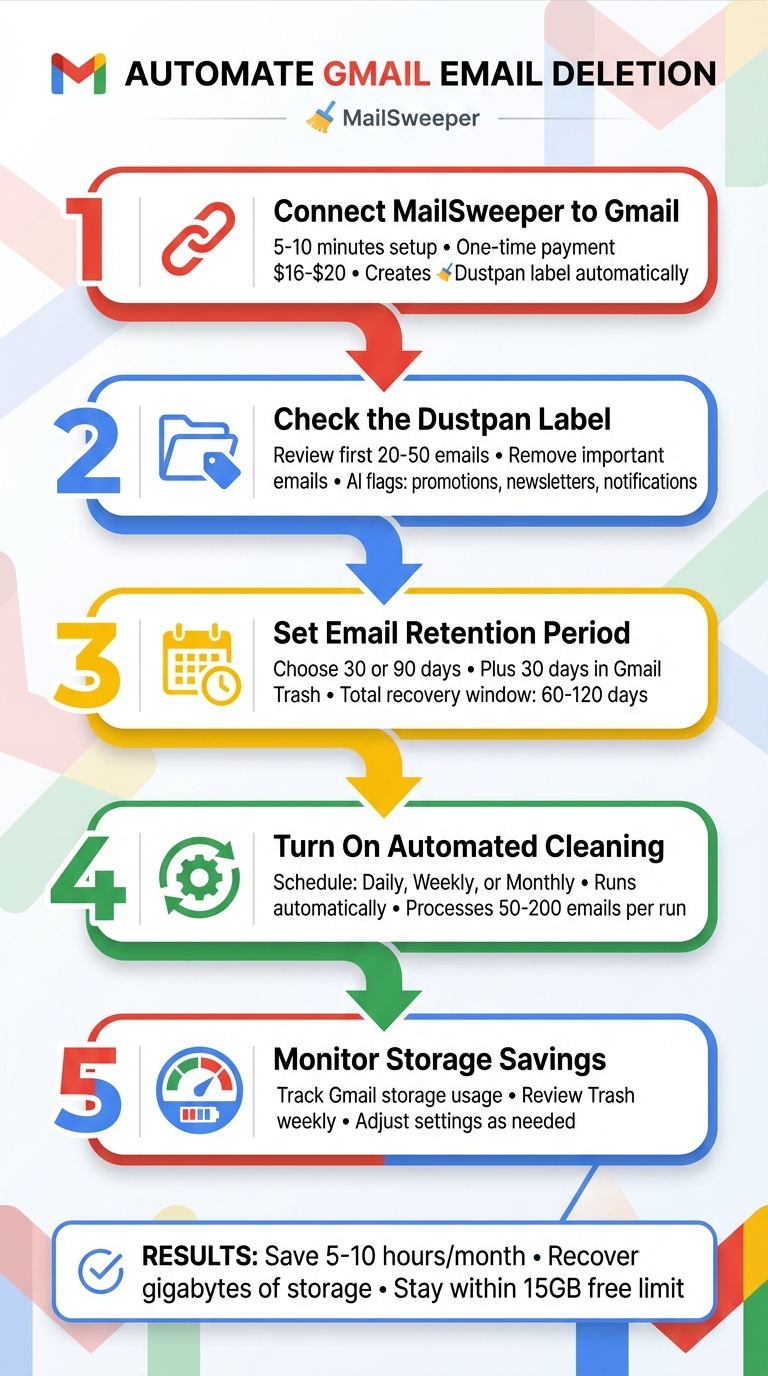
- Connect MailSweeper: Authorize it to access your Gmail and set up the "Dustpan" label where flagged emails are stored.
- Review the Dustpan Label: Check flagged emails to ensure no important ones are misclassified.
- Set Retention Period: Choose between 30 or 90 days for how long flagged emails are kept before deletion.
- Enable Automated Cleaning: Schedule daily, weekly, or monthly cleanups to keep your inbox tidy.
- Monitor Storage: Track Gmail storage usage and adjust settings if needed.
With MailSweeper, you can save hours of manual inbox management and stay within Gmail’s free storage limit. Set it up today and enjoy a clutter-free inbox!
5 Steps to Automate Gmail Email Deletion with MailSweeper
How To Automatically Delete Gmail Emails (Step By Step)
Step 1: Connect MailSweeper to Your Gmail Account
Getting MailSweeper up and running takes just 5–10 minutes. Start by picking a plan, completing a one-time payment, and authorizing access to your Gmail account. Once connected, MailSweeper will create the Dustpan label in your Gmail sidebar. This is where AI-sorted emails will be temporarily stored before being automatically deleted. Now, let’s get started by selecting the right plan for you.
Choose Your MailSweeper Plan
MailSweeper offers two one-time payment options: Early Bird for $16 (limited to 3 spots) or Personal for $20. Both plans provide the same features, including AI-powered email cleaning, retention settings, and periodic deletions. The difference in price is based on availability, so if the Early Bird option is still open when you visit mailsweeper.co, you can save $4 compared to the Personal plan.
And here’s the best part - this is a one-time payment. No subscriptions. No recurring fees.
Connect MailSweeper to Gmail
Once you’ve made your purchase, you’ll receive an email with your login credentials. Use these to access your MailSweeper dashboard. From there, click "Connect Gmail," choose your Google account, and grant the necessary permissions to manage labels. The process uses Gmail’s standard OAuth system, ensuring a secure connection. If needed, you can revoke access anytime through your Google Account settings.
MailSweeper only interacts with your emails for labeling and deletion purposes and complies with Google’s security standards (it’s CASA certified). Within 2–3 minutes of authorization, you’ll see the 🧹Dustpan label appear in your Gmail sidebar. To ensure everything is working, try sending a sample promotional email - it should be tagged with the Dustpan label. Once verified, you’re ready to move on to the next step.
Step 2: Check the Dustpan Label in Gmail
Make sure the 🧹Dustpan label is active in Gmail. Start by opening Gmail and checking the left sidebar. Scroll down to the Labels section and look for "Dustpan." If you don’t see it right away, click "More" to expand the list. Once located, click on the Dustpan label to open it and review the collected emails.
This label contains emails that MailSweeper's AI has flagged as low-priority, such as promotional messages, newsletters, notifications, calendar invites, and shopping deals. If there’s a bold number next to the Dustpan label (e.g., "Dustpan (23)"), it indicates the number of unread emails. A regular number shows the total conversations stored there.
Take a moment to review the first 20–50 emails. If you spot anything important, remove the Dustpan label by clicking the label icon. This ensures those emails are no longer marked as low-priority.
MailSweeper includes safety features to protect your critical messages. Emails in your Primary tab, starred emails, and Gmail-designated important messages are automatically excluded from the Dustpan. To double-check, search for label:dustpan is:starred or label:dustpan is:important in the Gmail search bar. If these searches return no results, you can trust that your important messages are untouched.
For mobile users, open the Gmail app, tap the menu icon, scroll down to "Dustpan", and tap to view its contents. Whether you’re on desktop or mobile, the Dustpan helps declutter your inbox while keeping essential emails safe.
Step 3: Set Your Email Retention Period
Decide how long you'd like to keep low-priority emails before they’re automatically deleted. MailSweeper gives you two options: 30 days or 90 days. This setting determines when emails in the Dustpan are moved to Gmail's Trash, where they’ll remain for another 30 days before being permanently deleted.
If your inbox is flooded with promotional emails, the 30-day option might be best for quicker cleanup. On the other hand, if you occasionally need to revisit older notifications, the 90-day option provides a longer safety net.
To set this up, log into your MailSweeper dashboard. Go to Dustpan Settings, select your preferred retention period from the dropdown menu, and hit Save. Changes usually take effect within 24 hours.
You can also fine-tune the AI cleaning rules to ensure important emails aren’t mistakenly deleted. Adjust categories, whitelist specific senders, or exclude certain keywords. For instance, if you don’t want bank statements to be auto-deleted, add "bank" to your exclusion list. Test these settings with a small batch of emails and monitor the results over a full cycle to make sure everything works as intended.
Keep in mind that Gmail Trash retains deleted emails for 30 days. So, if you choose a 90-day retention period, you effectively have a total recovery window of 120 days.
sbb-itb-34b9fd2
Step 4: Turn On Automated Cleaning
Fine-Tune AI Email Sorting
Spend a week reviewing emails in your Dustpan label. Look through 10–20 emails and check for any important messages - like bank alerts, tax receipts, or personal emails - that might have been misclassified. Remove the Dustpan label from these messages and mark them as important to ensure they’re not deleted in the future.
For added accuracy, search specific senders or keywords in Gmail. For example, you can type from:amazon older_than:30d to find older emails from Amazon. If you notice purchase confirmations or receipts that need to be saved, add keywords like "receipt" or "order confirmation" to your exclusion list. Once you’re confident the sorting is accurate, you’re ready to set up automated cleaning.
Schedule Regular Cleaning
When you’re satisfied with the AI’s sorting, go to Settings > Automated Cleaning in your MailSweeper dashboard. Switch on "Enable Periodic Cleaning" and choose a schedule: daily (runs at midnight ET), weekly (Sundays at 2:00 AM ET), or monthly (on the first of each month). For most users, a weekly schedule works well, but if you’re dealing with over 100 promotional emails daily, a daily schedule might be more effective.
The automated cleaning will move emails in the Dustpan label that are older than your retention period (30 or 90 days, as set in Step 3) to Gmail’s Trash. Keep in mind, Gmail holds emails in Trash for another 30 days before permanently deleting them, giving you a window to recover anything if needed. Don’t forget to hit Save to activate the schedule. MailSweeper will begin running within 24 hours. To test it out, click "Run Now" - this will process 50–200 emails depending on the size of your inbox.
Step 5: Monitor Storage Savings and Adjust Settings
Once automated cleaning is up and running, it's important to keep an eye on your Gmail storage and ensure that no important emails are accidentally removed.
Check Gmail Storage Usage
In the desktop version of Gmail, you'll find a storage meter at the bottom-left corner (e.g., "9.4 GB of 15 GB used"). This meter reflects the total storage used across Gmail, Google Drive, and Google Photos within your Google Account.
Before your first cleanup, make a note of your current Gmail storage usage. After the scheduled cleaning takes place (usually within 24–72 hours), check the storage page again to see the difference. For instance, if your storage started at 12.4 GB and dropped to 9.7 GB two weeks later, you've freed up about 2.7 GB. MailSweeper's regular cleanups should result in noticeable space savings. If you're curious about large emails still taking up space, Gmail search operators like larger:10M or filtering by categories (e.g., promotions) can help you identify them.
Review Deleted Emails
Deleted emails remain in Gmail's Trash for 30 days. During your first month using MailSweeper, it's a good idea to check your Trash folder weekly to ensure no important messages - such as bank notifications, receipts, or work-related emails - were mistakenly deleted. You can search by sender or subject to confirm that critical emails are safe.
Additionally, make it a habit to review the 🧹Dustpan label. Skim through a few pages of emails to ensure the AI isn't flagging messages you'd prefer to keep. If you spot an important message in the Dustpan, you can remove the label or move it back to your Inbox before the next automated cleanup. If you notice recurring issues with emails from financial institutions, legal contacts, or healthcare providers ending up in the Dustpan, update your MailSweeper settings to exclude those senders or domains. Regular checks and adjustments will help MailSweeper maintain an efficient and accurate decluttering process.
Conclusion
By following these five steps - connecting MailSweeper to your Gmail account, checking the Dustpan label, setting your retention period, enabling automated cleaning, and keeping an eye on your storage savings - you can say goodbye to hours of manual inbox cleanup. This hands-free process simplifies email management and gives you back valuable time.
Here’s the bottom line: Most MailSweeper users recover gigabytes of storage, staying within Gmail’s free 15 GB limit and avoiding extra storage fees. On top of that, they save 5–10 hours every month that would’ve been spent wading through promotions, newsletters, and endless notifications. A streamlined inbox means less mental clutter, letting you focus on what truly matters. MailSweeper’s AI takes care of sorting and deleting emails, so you’re no longer drowning in thousands of unread messages.
Don’t forget to occasionally review your Dustpan and Trash folders to ensure the AI settings are working just the way you want. Once everything’s dialed in, you can let the automation handle the rest without constant supervision.
Ready to take control of your inbox? For a one-time $20 payment, MailSweeper offers stress-free, automated email management - set it up today and enjoy the freedom of a clutter-free inbox.
FAQs
How does MailSweeper avoid deleting important emails by mistake?
MailSweeper helps safeguard your essential emails by letting you decide what stays and what goes. You can easily remove labels from emails you want to keep, ensuring they don’t get caught up in automated deletions.
This way, only the less important emails are removed, keeping your vital messages intact and your inbox tidy.
Can I change MailSweeper's settings if it's not sorting emails the way I want?
Yes, MailSweeper lets you adjust its settings to match your preferences. Whether during the initial setup or later through the app, you can fine-tune how emails are sorted and managed.
If you find emails being categorized incorrectly, you can easily update the settings to improve how MailSweeper identifies and handles less important messages. This way, your inbox stays neat and arranged exactly how you want it.
What happens to emails after MailSweeper moves them to Gmail's Trash?
When MailSweeper transfers emails to Gmail's Trash, those messages stay there for 30 days. After that, Gmail automatically deletes them permanently. This gives you a month-long window to retrieve any emails before they're gone forever.
